For Plumbers: How to disconnect or reconnect the Elon® 100 or Smart
What to do when you need to replace or service a geyser with an Elon® 100 connected.
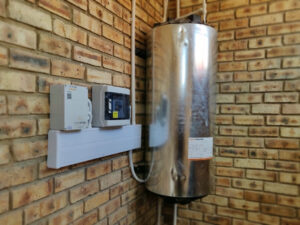
This page provides step-by-step instructions for plumbers on how to disconnect, reconnect and recommission an Elon® 100 solar PV water heater connected to a standard electric geyser.
For example, you might need to replace or service the geyser, and need to disconnect the Elon® 100 unit for this purpose.
Switch off the geyser circuit breaker in the main DB board.
Switch off both the AC isolator and DC circuit breaker or isolator.
Remove the geyser cover.
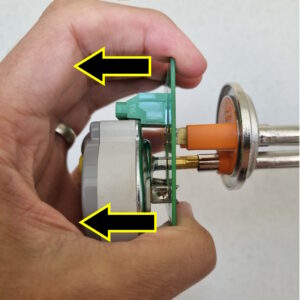
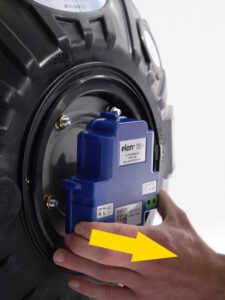
Pull out the green element adapter and thermostat from the element by pulling on the element adapter (see the photo). No need to disconnect any of the wires.
You can now replace or service the geyser.
Step 3. Pull out the green element adapter and thermostat from the element by pulling on the element adapter.
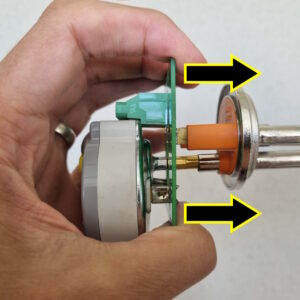
Plug the element adapter with thermostat (and with wires still attached) back into the element (see photo). IMPORTANT: Please make very sure that the two male terminals of the green element adapter both seat properly into the element female terminals. Tug on it to make sure both fit snugly.
Replace the geyser cover.
Turn the Elon® controller dial to setting “Solar Only”.
Switch on both the AC isolator and DC circuit breaker or isolator.
Switch on the geyser circuit breaker in the main DB board.
You are now ready to recommission the Elon® 100 (see the next section).
Step 1. Plug the element adapter with thermostat back into the element.
STEPS TO RECOMMISSION THE ELON® 100 SOLAR PV WATER HEATER
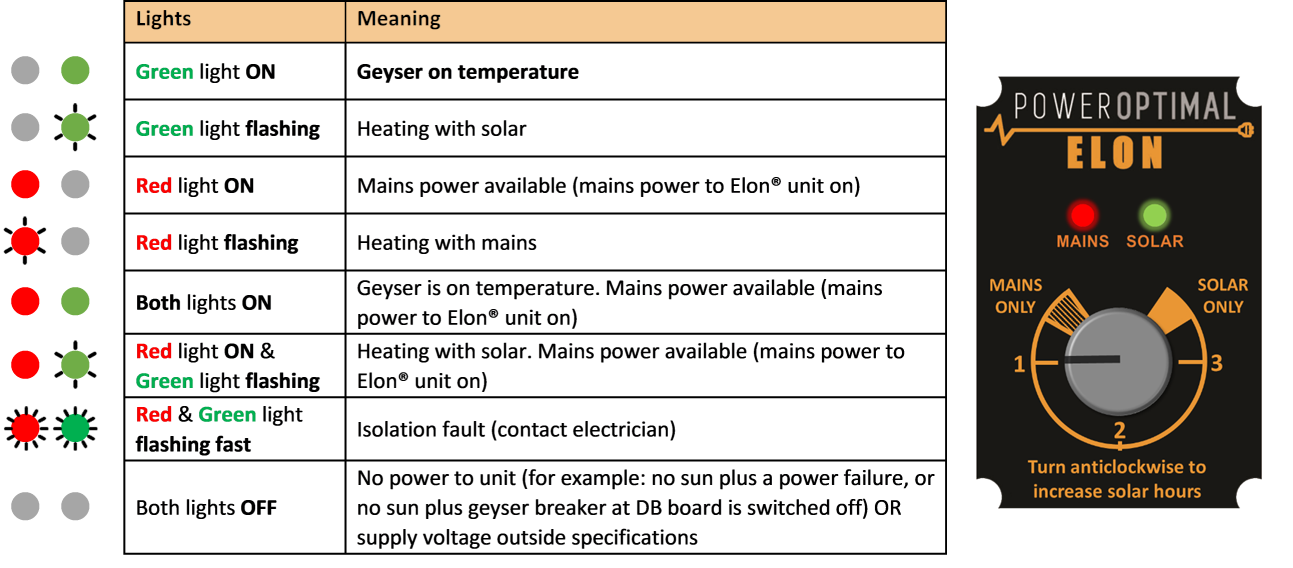
Check that the Elon® is operational by checking that at least one light is flashing or on (see diagram below).
Confirm solar PV array supply voltage and DC power to geyser when thermostat is closed. The green light should be flashing. The Elon® 100 will switch DC power to the geyser approximately 10 to 15 seconds after DC power to the Elon® has been switched on (if there is enough sunlight). (If thermostat is not closed, open hot water tap in house until thermostat closes.).
Test mains power supply by turning the dial to “MAINS ONLY”. The red light should start flashing (except if geyser is already at thermostat setpoint temperature). NOTE THAT THE ELON® WILL ONLY SWITCH TO MAINS 5 MINUTES AFTER MAINS POWER SWITCH-ON OR RECONNECTION. This is to allow grid power to stabilize after a power failure.
Confirm that no power is supplied to geyser element when thermostat is open (turn thermostat set point to lowest temperature setting – you should hear an audible click when the thermostat opens).
Set thermostat back at desired temperature (60 °C maximum).
Set the controller to setting “3” or other setting as per customer preference.
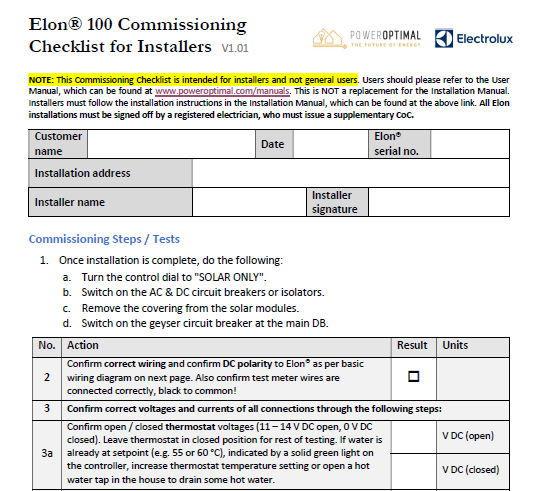
You can download a commissioning checklist from this page.
What to do when you need to replace or service a geyser with an Elon® Smart connected.
This page provides step-by-step instructions for plumbers on how to disconnect, reconnect and recommission an Elon® Smart thermostat connected to a standard electric geyser.
For example, you might need to replace or service the geyser, and need to disconnect the Elon® Smart thermostat for this purpose.
STEPS TO DISCONNECT THE ELON® SMART FROM THE GEYSER
Switch off the geyser circuit breaker in the main DB board.
Switch off both the AC isolator and DC circuit breaker or isolator.
Remove the geyser cover.
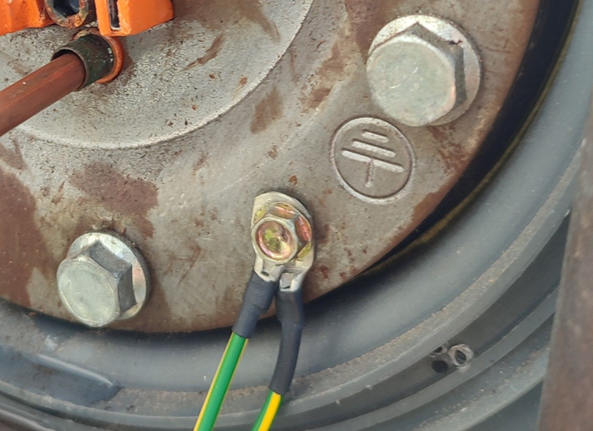
Disconnect the Elon Smart earth wires from the geyser earth stud.
Pull out the Elon Smart thermostat from the element by pulling on both sides. No need to disconnect the grid and/or solar wires connected to the Elon Smart.
You can now replace or service the geyser.
Step 5. Pull out the Elon Smart thermostat from the element.
Plug the Elon Smart thermostat (with wires still attached) partly but not fully back into the element.
Reconnect the two Elon Smart earth wires to the geyser earth stud.
Push the Elon Smart thermostat into the element. IMPORTANT: Please make very sure that the two male terminals of the Elon Smart thermostat both seat properly into the element female terminals. Tug on it to make sure both fit snugly. Check both the AC (grid) and DC (solar) wires to make sure they are still tightly connected.
Replace the geyser cover.
Switch on both the AC isolator and DC circuit breaker or isolator.
Switch on the geyser circuit breaker in the main DB board.
Wait 30 seconds for the Elon Smart to boot up, then ask a household resident to check if they can connect to the Elon Smart unit from the Elon Smart app on their phone by tapping the Configure (hammer & spanner) button next to their Elon Smart unit in the app.
If needed, you can download the Elon Smart app to your own iPhone or Android by searching “Elon Smart Water” in the app store, scanning the QR code below or tapping here for Android or here for iPhone.
Once you’ve installed the app, open the app, and tap the “+” button in the app and scan the Elon Smart QR code by the DB board to add it to your app.
Step 2.Reconnect the two Elon Smart earth wires to the geyser earth stud.